
Partition Magic Software Partition magic software for Windows Server 2000/2003/2008/2008 R2/2012/2012 R2, Windows XP/Vista/7/8/8.1/10, etc.
Changing Partition Attributes
This chapter explains how the user can change partition attributes (Active flag, Hidden flag, Partition ID or File system ID is a file system identifier that is placed in the partition. It is used to quickly detect partitions of supported types. A number of operating systems completely rely on it to distinguish supported partitions. Partition ID is saved in appropriate entries of the Partition Table and takes only 1 byte of space., Volume Label, etc.).
Mark Partition Active/Inactive
The program enables to set Active/Inactive flag for primary partitions of the hard disk. By default the operating system will boot from the active (bootable) partition at startup.
In order to mark partition Active/Inactive the user should take the following steps:
1. Select a primary partition on the Disk Map.
2. There are several ways to Mark Partition Active/Inactive:
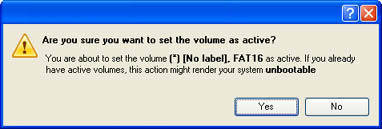
There can only be one active partition is a partition from which an x86-based computer starts up. The active partition must be a primary partition on a basic disk. If you use Windows exclusively, the active partition can be the same as the system volume. In the DOS partitioning scheme, only primary partitions can be active due to limitations of the standard bootstrap. on a hard disk, otherwise the operating system will fail to boot.
3. The operation will be performed immediately after confirmation.
Hide/Unhide Partition
The program allows the user to Hide/Unhide primary and logical partitions. The operating system does not mount hidden partitions, thus preventing access to their contents.
In order to Hide/Unhide a partition the user should take the following steps:
1. Select a partition on the Disk Map.
2. There are several ways to Hide/Unhide partitions:
Set Label of a Partition
The Partition Label is a small textual field (up to 11 characters) that is located in the partition's boot sector. This value is detectable by any partitioning tool; it is used for notification purposes only.
In order to change a partition label the user should take the following steps:
1. Select a partition on the Disk Map.
2. Call the Change Volume Label or Partition Label is a small textual field (up to 11 characters) that is located in the partition's boot sector. This value is used for notification purposes only. It is detectable by any partitioning tool including the DOS FDISK utility.
Modern operating systems save it within a file system, e.g. as a special hidden file. Thus it is able to contain a relatively large amount of text in multiple languages. dialog to define appropriate settings. There are several ways to do it:
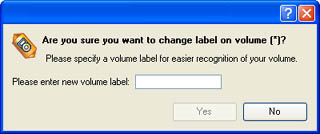
New volume label. Enter the new value of the Partition Label. The length of the Label is limited to 11 characters.
The dialog also displays the current partition label.
4. The operation will be performed immediately after confirmation.
Change Partition ID
Partition ID is an identifier of a file system that is placed in the partition. Partition ID is saved in the Partition Table; it is used to quickly detect partitions of supported types. By manually changing the Partition ID value, it is possible to manipulate the accessibility of partitions.
In order to change a Partition ID the user should take the following steps:
1. Select a partition on the Disk Map.
2. Call the Change Partition ID dialog to define appropriate settings. There are several ways to do it:
Change Serial Number of a Partition
FAT16, FAT32, HPFS and NTFS file systems include the Serial Number parameter. The partition's Serial Number In the DOS partitioning scheme, every hard disk and every partition has a 32-bit serial number represented by an 8-figure hexadecimal value. It is stored in the MBR and its value is assigned when the MBR sector is initialized by Microsoft standard disk managing tools, such as Windows Disk Administrator and the FDISK utility. In fact, a hard disk's serial number is not important for most operating systems and software. It is known that Windows NT, 2000 and XP store its value in the database of assigned drive letters. A partition's serial number is stored in its boot sector (in FAT16, FAT32 and NFTS file systems). Its value is assigned when the partition is formatted. It does not play an important role for most operating systems and software as well. is saved in the boot sector; its value is generated while formatting a partition.
The program enables to modify the partition's Serial Number on formatted FAT16, FAT32, HPFS and NTFS partitions without re-formatting.
In order to start the operation the user should take the following steps:
1. Select a partition on the Disk Map.
2. Call the Change Partition Serial Number dialog to define appropriate settings. There are several ways to do it:
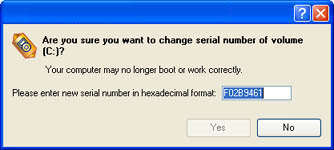
New serial number. The user can enter the new Serial Number value in this textual field. The Serial Number should contain 8 hexadecimal figures (0..9 or A..F). The operation cannot be accomplished until the user enters all 8 symbols.
4. The operation will be performed immediately after confirmation.
Change Boot Size
Major file systems use initial sectors of a partition to store the bootable code of an operating system. This area of a partition is generally known as the Bootable Area, or the Boot Sector (actually it takes up several sectors).
The program provides the ability to modify the Bootable Area size of the FAT formatted partitions without destroying data.
In order to start the operation the user should take the following steps:
1. Select a FAT partition on the Disk Map.
2. Call the Change Boot Size dialog to define appropriate settings. There are several ways to do it:
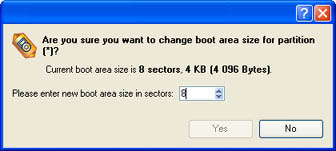
Sectors per boot. Specify a new Boot Size value.
4. The operation will be performed immediately after confirmation.
Change Root Size
The maximum capacity of the Root Directory is the top-level directory of a formatted logical drive to include other files and directories. In modern file systems (Ext2/Ext3, NTFS and even FAT32) it does not differ from other directories. This is not the case for old FAT12 and FAT16 file systems. is an essential parameter of old FAT12 and FAT16 file systems.
In order to start the operation the user should take the following steps:
1. Select a FAT partition on the Disk Map.
2. Call the Change Root Size dialog to define appropriate settings. There are several ways to do it:
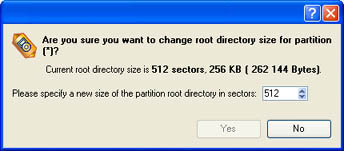
Root entries. Specify a new Root Directory Size value.
4. The operation will be performed immediately after confirmation.
Mark Partition Active/Inactive
The program enables to set Active/Inactive flag for primary partitions of the hard disk. By default the operating system will boot from the active (bootable) partition at startup.
In order to mark partition Active/Inactive the user should take the following steps:
1. Select a primary partition on the Disk Map.
2. There are several ways to Mark Partition Active/Inactive:
- Select in the Main menu: Partition > Mark Partition Active/Inactive.
- Call the popup menu for the selected partition (right click of the mouse button) on the Disk Map or on the List of Partitions, then select the menu item: Mark Partition Active/Inactive.
There can only be one active partition is a partition from which an x86-based computer starts up. The active partition must be a primary partition on a basic disk. If you use Windows exclusively, the active partition can be the same as the system volume. In the DOS partitioning scheme, only primary partitions can be active due to limitations of the standard bootstrap. on a hard disk, otherwise the operating system will fail to boot.
3. The operation will be performed immediately after confirmation.
Hide/Unhide Partition
The program allows the user to Hide/Unhide primary and logical partitions. The operating system does not mount hidden partitions, thus preventing access to their contents.
In order to Hide/Unhide a partition the user should take the following steps:
1. Select a partition on the Disk Map.
2. There are several ways to Hide/Unhide partitions:
- Select in the Main menu: Partition > Hide/Unhide Partition.
- Call the popup menu for the selected partition (right click of the mouse button) on the Disk Map or on the List of Partitions, then select the menu item: Hide/Unhide Partition.
Set Label of a Partition
The Partition Label is a small textual field (up to 11 characters) that is located in the partition's boot sector. This value is detectable by any partitioning tool; it is used for notification purposes only.
In order to change a partition label the user should take the following steps:
1. Select a partition on the Disk Map.
2. Call the Change Volume Label or Partition Label is a small textual field (up to 11 characters) that is located in the partition's boot sector. This value is used for notification purposes only. It is detectable by any partitioning tool including the DOS FDISK utility.
Modern operating systems save it within a file system, e.g. as a special hidden file. Thus it is able to contain a relatively large amount of text in multiple languages. dialog to define appropriate settings. There are several ways to do it:
- Select in the Main menu: Partition > Modify > Change Volume Label.
- On the Explorer bar: click on the current volume label.
- Call the popup menu for the selected partition (right click of the mouse button) on the Disk Map or on the List of Partitions, then select the menu item: Change Volume Label.
New volume label. Enter the new value of the Partition Label. The length of the Label is limited to 11 characters.
The dialog also displays the current partition label.
4. The operation will be performed immediately after confirmation.
Change Partition ID
Partition ID is an identifier of a file system that is placed in the partition. Partition ID is saved in the Partition Table; it is used to quickly detect partitions of supported types. By manually changing the Partition ID value, it is possible to manipulate the accessibility of partitions.
In order to change a Partition ID the user should take the following steps:
1. Select a partition on the Disk Map.
2. Call the Change Partition ID dialog to define appropriate settings. There are several ways to do it:
- Select in the Main menu: Partition > Modify > Change Partition ID…
- On the Explorer bar: click on the current partition ID.
- Call the popup menu for the selected partition (right click of the mouse button) on the Disk Map or on the List of Partitions, then select the menu item: Change Partition ID…
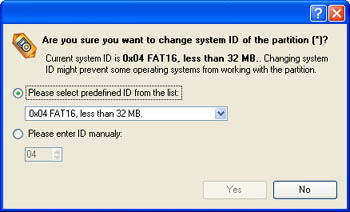
- Predefined ID. Select from the pull-down list ID values for various file systems.
- Enter ID manually. The textual field contains a hexadecimal presentation of the Partition ID. Generally, the Partition ID should be presented as 1-2 digits hexadecimal number; only hexadecimal digits {0..9, A..F} are allowed to be used.
Change Serial Number of a Partition
FAT16, FAT32, HPFS and NTFS file systems include the Serial Number parameter. The partition's Serial Number In the DOS partitioning scheme, every hard disk and every partition has a 32-bit serial number represented by an 8-figure hexadecimal value. It is stored in the MBR and its value is assigned when the MBR sector is initialized by Microsoft standard disk managing tools, such as Windows Disk Administrator and the FDISK utility. In fact, a hard disk's serial number is not important for most operating systems and software. It is known that Windows NT, 2000 and XP store its value in the database of assigned drive letters. A partition's serial number is stored in its boot sector (in FAT16, FAT32 and NFTS file systems). Its value is assigned when the partition is formatted. It does not play an important role for most operating systems and software as well. is saved in the boot sector; its value is generated while formatting a partition.
The program enables to modify the partition's Serial Number on formatted FAT16, FAT32, HPFS and NTFS partitions without re-formatting.
In order to start the operation the user should take the following steps:
1. Select a partition on the Disk Map.
2. Call the Change Partition Serial Number dialog to define appropriate settings. There are several ways to do it:
- Select in the Main menu: Partition > Modify > Change Serial Number.
- On the Explorer bar: click on the current serial number.
New serial number. The user can enter the new Serial Number value in this textual field. The Serial Number should contain 8 hexadecimal figures (0..9 or A..F). The operation cannot be accomplished until the user enters all 8 symbols.
4. The operation will be performed immediately after confirmation.
Change Boot Size
Major file systems use initial sectors of a partition to store the bootable code of an operating system. This area of a partition is generally known as the Bootable Area, or the Boot Sector (actually it takes up several sectors).
The program provides the ability to modify the Bootable Area size of the FAT formatted partitions without destroying data.
In order to start the operation the user should take the following steps:
1. Select a FAT partition on the Disk Map.
2. Call the Change Boot Size dialog to define appropriate settings. There are several ways to do it:
- Select in the Main menu: Partition > Modify > Change Boot Size…
- On the Explorer bar: click on the current sectors per boot value.
Sectors per boot. Specify a new Boot Size value.
4. The operation will be performed immediately after confirmation.
Change Root Size
The maximum capacity of the Root Directory is the top-level directory of a formatted logical drive to include other files and directories. In modern file systems (Ext2/Ext3, NTFS and even FAT32) it does not differ from other directories. This is not the case for old FAT12 and FAT16 file systems. is an essential parameter of old FAT12 and FAT16 file systems.
In order to start the operation the user should take the following steps:
1. Select a FAT partition on the Disk Map.
2. Call the Change Root Size dialog to define appropriate settings. There are several ways to do it:
- Select in the Main menu: Partition > Modify > Change Root Size…
- On the Explorer bar: click on the current root entries value.
Root entries. Specify a new Root Directory Size value.
4. The operation will be performed immediately after confirmation.
7Tools Partition Manager Help
Basic Concepts
Interface Overview
- General Layout
- Main Menu
- Tool Bar
- Virtual Operations Bar
- Common Tasks Bar
- Disk Map
- Explorer Bar
- List of Partitions
- Legend Bar
- Status Bar
Settings Overview
- General Options
- General Copy and Backup Options
- Hot Processing Options
- Partitioning Options
- Virtual Mode Options
- File System Conversion Options
- E-Mail Options
Getting Information about Disks
Partition Management
Hard Disk Management
Copy Tasks
Boot Management
Build Recovery Media
Extra Functionality
Copyright (C) 2018 www.partition-magic.com, All Rights Reserved. PartitionMagic ® is a registered trademark of Symantec Corporation.